Know When a Plant Actually Needs a New Pot
Houseplant repotting is the process of moving a plant into fresh growing medium, a more suitable container, or both. It is useful when roots have filled the available space, the old mix no longer holds moisture and air well, or a plant has outgrown a damaged pot. A plant does not need repotting simply because it is tall or because roots are visible near the soil surface. Many indoor plants grow best with a slightly snug root system. Before starting, look for several consistent signs: roots circling densely inside the pot, roots pushing through drainage holes, water rushing straight through dry soil, a pot that tips easily, or growth that has slowed despite appropriate light and ordinary care. Examine the whole situation rather than relying on one clue.
The season and the plant’s condition also matter. Repotting is generally easiest when a plant is actively beginning a growth period, because it can produce new roots more readily. However, local light levels and indoor conditions vary, so plant response is more useful than a fixed calendar. Avoid disturbing a plant that is severely dehydrated, newly purchased and still adjusting, flowering heavily, or struggling with pests unless there is an urgent root or drainage problem. If roots are rotting from persistently wet soil, prompt action may be necessary. In that case, remove the wet medium, trim only soft or dead roots with clean tools, and place the plant in an appropriately sized pot with a suitable mix. When in doubt, change the soil rather than greatly increasing pot size.
Choose a Pot That Supports Drainage and Stability
The most practical pot has one or more drainage holes, allowing excess water to leave the root zone. A decorative outer container without holes can still be useful as a cover pot, but the plant should remain in a separate draining nursery pot that can be lifted out for watering. This arrangement helps prevent water from collecting unnoticed around roots. Select a new pot that is only modestly wider than the current root mass for most common houseplants. An oversized container holds a large volume of damp mix around a small root system, which can stay wet for too long. For a very large floor plant, replacing the upper layer of old soil may be safer and more manageable than moving it into a much bigger vessel.
Pot material changes how quickly soil dries. Unglazed terracotta is porous and can suit plants that prefer their mix to dry relatively quickly, while glazed ceramic, plastic, and metal-lined containers usually retain moisture longer. Weight is another consideration: a heavy pot can steady a tall plant, whereas lightweight plastic may be easier to move and less likely to damage a shelf. Always check that a container is stable on the surface where it will live. Do not place rocks, broken pottery, or other filler in the bottom as a substitute for drainage; this reduces the depth of usable soil and does not solve the problem of a pot without holes. Use a saucer to protect furniture, then empty standing water after watering.
Match the Potting Mix to the Plant’s Root Needs
Potting mix is not ordinary garden soil. Garden soil can compact indoors, drain poorly in containers, and may introduce unwanted organisms. A container mix is designed to balance moisture retention, air spaces, and support for roots. Still, no single blend fits every houseplant. Many foliage plants do well in a general indoor potting mix, while plants with thick, moisture-sensitive roots often need extra coarse material for airflow. Orchids commonly require a bark-based medium rather than fine potting mix, and cacti or succulents generally need a fast-draining blend. Read the care guidance for the plant type and observe how its current soil behaves. If it remains wet for a long time in the plant’s usual light, choose a more open mix rather than watering less predictably.
Gather supplies before exposing the roots: a clean pot with drainage, appropriate fresh mix, a tray or mat, gloves if desired, and clean hand pruners for roots that are clearly dead or damaged. A small scoop can help, but hands provide better control around delicate roots. If a plant is known to be irritating or toxic when chewed, keep it away from children and pets during the project, collect fallen leaves promptly, and wash hands afterward. Keep soil and tools off food-preparation surfaces. Avoid adding fertilizer to freshly repotted plants unless the product directions specifically support that use and the plant is healthy. Fresh mixes may already contain nutrients, and disturbed roots benefit more from stable conditions than from extra inputs. Follow all package labels and store products securely.
Repot Gently Without Compressing the Roots
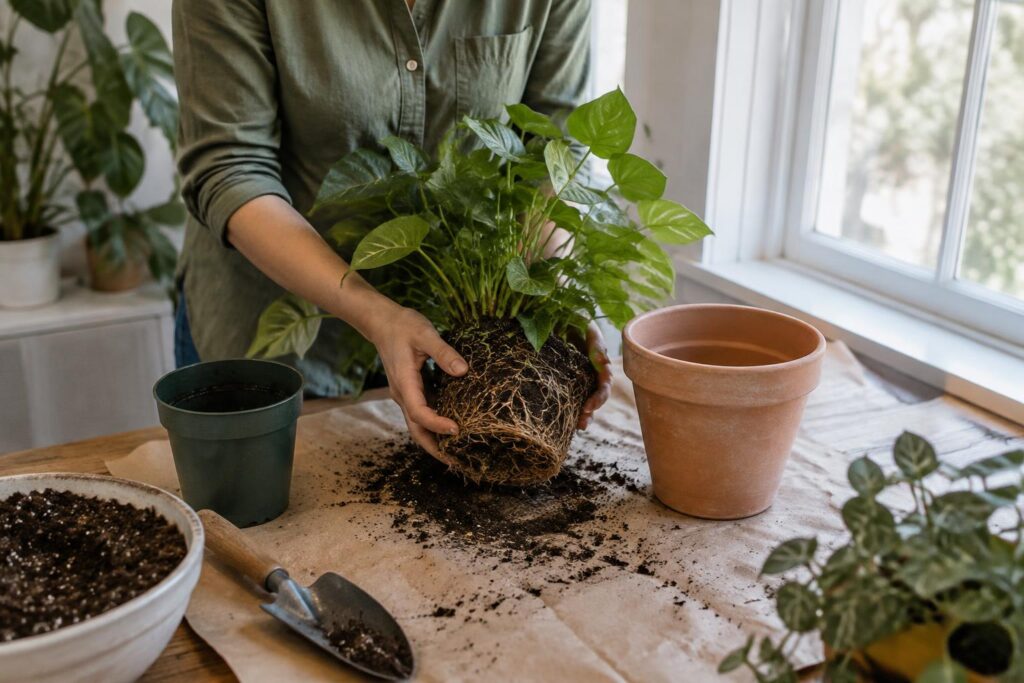
Water the plant lightly a day or so before repotting if its soil is very dry; a slightly moist root ball is usually easier to remove and less likely to crumble apart. Place the pot on its side, support the stems near the soil line without pulling them, and ease the root ball out by tapping or squeezing the flexible container. If the plant is stuck, run a blunt tool around the inside edge or cut away a disposable nursery pot rather than yanking the foliage. Inspect the roots. Firm, pale, tan, or plant-specific naturally colored roots are often healthy. Roots that are black, mushy, hollow, or foul-smelling may indicate decay. Remove only unhealthy portions using cleaned pruners, and discard contaminated soil rather than reusing it.
Loosen a few outer circling roots with your fingers if they are tightly wrapped, but do not aggressively tear apart a healthy root system. Put a shallow layer of mix in the new pot, then position the plant so its original soil line sits slightly below the rim. Keeping the stem at the same depth is important; burying it too deeply can encourage stem problems. Add fresh mix around the sides in small amounts, gently settling it with your fingers. The goal is contact around the roots, not tightly packed soil. Leave enough space at the top for watering. Once positioned, water slowly until some water exits the drainage holes, unless the mix and plant care requirements call for a different approach. Let the pot drain fully before returning it to its cover pot or saucer.
Provide Calm Aftercare and Watch for Adjustment Signs
After houseplant repotting, place the plant back in conditions close to those it already tolerated: similar light, moderate room temperatures, and protection from strong drafts. A newly disturbed root system may temporarily droop, pause growth, or lose a small older leaf. This does not automatically mean the repotting failed. Give it time to settle and avoid repeatedly moving it, pruning it heavily, or changing several care routines at once. Check the mix below the surface before watering again instead of following a rigid schedule. The correct interval depends on the plant species, pot size, container material, indoor temperature, humidity, light, and the openness of the mix. Water when the plant’s particular moisture preference indicates it needs it, then allow excess water to drain.
Review the result over the following weeks. If leaves yellow and the mix stays wet, assess whether the pot is too large, the soil is too dense, or the plant is receiving less light than before. If the mix dries unusually fast and the plant wilts, inspect for an undersized pot, very bright conditions, or a mix that is too coarse for that species. Pests, disease, and environmental stress can cause similar symptoms, so avoid assuming every issue is caused by repotting. For unusually large plants, plants with extensive rot, or specimens growing in heavy built-in containers, professional plant-care help may be worthwhile. Simple observation, a draining pot, and a mix matched to the plant’s needs are usually more valuable than frequent interventions.